Cute Boy Baby Shower Cake idea

Boy Oh Boy Cake

Boy Oh Boy Cake submitted by Jessica
I made this cake to match the invites to the baby shower.
It is a 10", 8"and 6" stacked cake.
Iced in butter cream with fondant and gum paste details.
The 10" and 6" are double layer torted and filled cakes. The 8" is 1 1/2 layers torted and filled, making it shorter then the other two cakes.
Supplies:
-10" round cake pans
-8" round cake pans
-6" round cake pans
-Decorated cake drum
-8" round cake board (to separate cake)
-6"round cake board (to separate cake)
-14 bubble tea straws (or wooded dowels)
-1 wooden dowel
-Toothpicks
-1 batch marshmallow fondant (or fondant of choice)
-Cardstock for template
-Piping bags
-# 2 decorating tip
-Cotton balls
-Tylose powder or gum paste (to mix with fondant)
-Small paintbrush
-Water
-1 batch royal icing
-Food coloring, brown and royal blue
-Enough butter cream to fill and ice cakes
Instructions:
1. Color fondant blue and brown, leave small amount white. To achieve blue add a little bit of brown to mixture knead in until desired color is achieved.
Mixing equal parts of red and green together can also make Brown. This will often produce a richer darker brown and requires less coloring. Wrap fondant and set aside.
2. The fondant letters, bow and rattles require at least 24 hours to dry but can be made weeks in advance.
To make the letter you can either use cutters or make your own template. To make a template I used cardstock to draw the letters and then cut them out. Mix your fondant with either an equal amount of gum paste or 1 tbls of Tylose powder. Go ahead and mix enough to make the bow and rattles as well.
Roll fondant mixture out and cut letter out. Let dry for an hour and then carefully insert toothpicks into bottoms of letters. Lay flat and let dry completely, at least 24 hours.
3. To make bow roll out fondant mixture cut a 10"-12" long 3" wide strip, using a ruler if necessary. Cut strip in half. Pinch both ends onto them self and then fold in half, putting a cotton ball in the fold to support the fondant. You will have 2 halves of a bow. Roll another strip about 3 inches long, brush a small amount of water onto strip, place both halves on strip, careful not to squish the bows. Fold short strip over and attach with water. Flip over the bow so the seam is down and allow to dry. For added detail you can use a seam wheel and add stitching to the edges of the "ribbon".
4. For the rattle roll 2 balls of the fondant mixture. Set aside. Then roll 2 strips of fondant, making sure they are the same length and in correct proportion to the balls. Set those aside; next roll 2 small balls for the ends of the rattles. Let all piece dry for about an hour, then insert a tooth pick into each end of the sticks, then using a small amount of water attach the big and small balls to each side of the sticks. Add a strip of white fondant to the big end and a small brown bow to the small end and let dry.
5. Level, torte and fill the cakes. Placing the 10" cake on the drum (attach to drum with butter cream), and the other 2 cakes on the cardboard cake circles. The 8" cake will be shorter then the other cakes. To achieve this leave out one layer of cake when torting and filling, this will make the cake 3 layers of cake and 2 layers of filling. The other cakes will have 4 layers of cake and 3 layers of filling.
Crumb coat the cakes and place back in the fridge to chill. Once chilled apply final coat of icing, smooth icing. I use a high-density foam paint roller to smooth the icing after it has crusted over.
6. To make 10" layer use card stock to cut a template for the paisley. Roll out fondant (brown and blue) and cut paisley out. Place on cake. Using royal icing colored blue, brown and white pipe designs on paisley. It's very easy just a bunch of dots.
Chill when done.
7. To make 8" layer use a ruler cut long brown strips of fondant various widths. Place around 8" layer. This part is kind of tricky to get the strips straight. It helps if your cake is completely chilled. After it is done place back in fridge.
8. To make 6" layer roll a rope of blue fondant and cut into equal parts, about the size of a blueberry. Roll each into a ball and then flatten. Using the end of a straw make a circle imprint into each flattened ball. Then with a toothpick make 4 buttonholes in each. Arrange on cake, you can either place them randomly or follow a pattern. Place cake back in fridge.
9. Once cakes are completely chilled you can began to assemble the cake. Chilling the cakes makes for easier assembling and cuts down on the dents and fingerprints.
Stick one straw into the 10"cake, cut straw about a 1/4" above the cake. Remove the straw and cut 7 other straws the exact length. If using wooden dowels you would do the same. Place 8 straws in 10"layer, in a circular manner. Place 8" cake on top of 10" cake, make sure it is centered, you can even use a level to make sure it is level, but if you cut your straws/dowels correctly it should be level. Using the same method place 6 straws into the 8" cake. Place 6" cake on top.
Sharpen the end of the wooden dowel and drive down through all cakes. I use a hammer to do this, tapping carefully. If the wooden dowel is taller then the cakes then pull out a little bit and trim the end with clippers.
10. Roll out fondant for borders. Cut 2 blue strips and one brown strip. Apply to cakes.
11. Stick letters on to cake. Attach bow to side of cake with royal icing, remember to remove cotton balls from bow when dry.
Place rattles on cake.
12. All done! This cake can also be made in pink with the saying "We are Tickled Pink"
printable boy baby shower ideas

Don't feel like you have to get super fancy when planning the baby shower cake. Some easy ideas for decorating boy-themed baby shower cakes are:
- Make a cake and frost it either white, blue, green, or yellow (or any color to match your theme.) Keep it simple by embellishing the cake with a few sprinkles and add a "cake sign" made from paper saying something like "Oh Baby!" or "Oh Joy! It's A Boy!" Making a cake sign is easy! All you have to do is print out the saying onto card stock, cut out and glue to patterned scrap book paper that matches the shower colors and theme. Cut the sign out and attach a wooden skewer or lollipop stick. Poke into the cake and you're all set.
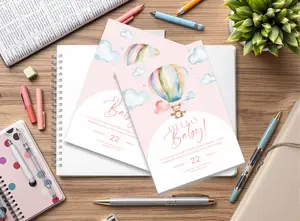
Printable Baby Boy Clipart

Make banners, garland, signs and more, with our baby boy clipart! You can find it over at our printable shop.
- Return from Boy Baby Shower Cakes - Back to Main Cake Gallery
- See Boy Baby Shower Theme Ideas
- More Boy Baby Shower Ideas
FREE printable baby shower signs

Recent Articles
-
100 Modern Baby Shower Ideas for Girls and Boys
Apr 24, 26 03:09 PM
 Easy baby shower ideas for girls and boys! Modern baby shower games that are actually fun, baby shower favors that won't get thrown away, and more!
 -
The Ultimate Due Date Calculator
Apr 23, 26 11:31 PM
 When Is Baby Due? Find Out With Our Due Date Calculator
 -
Popular Baby Shower Guest List Tracker
Apr 23, 26 06:08 PM
Stay Organized With Our Baby Shower Guest List Tracker


Hi, I'm Amy!
I'm a mom of two and grandma to two sweet granddaughters, and baby showers are my happy place. I created this site to share everything I've learned about planning showers that feel personal, beautiful, and stress-free.